I recently took the plunge and installed Windows 8 which meant re-installing Picasa. As I had to go through the pain of installing a new operating system and all my applications I thought I might as well get a solid state drive (SSD) to go along with it. While I love the SSD I’ve found Win 8 to be a bit of a disappointment on the desktop but anyway that is beside the point of this article.
I’ve got literally thousands of images stored in Picasa so while I could use the built in back up system it wasn’t an ideal solution for me. My pictures are stored remotely on a NAS device so the path to all the images wouldn’t change from the existing to the new install of Picasa. This got me thinking that it might be possible to just migrate across the settings and leave the images untouched – it turns out it was and this is how you do it.
Step 1 – Make Sure Your Pictures Are Safe
Goes without saying really, you’re mucking about with your memories here so make sure they are backed up somewhere safe. You are, of course, taking regular backups anyway so this should be done before you’ve even sat down to the computer.
Step 2 – Copy the Picasa Settings
If you go to this folder:
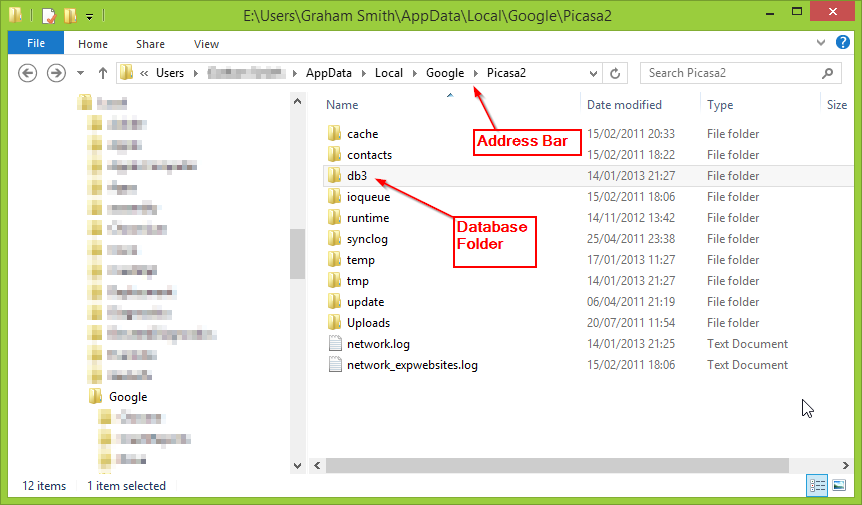
C:\Users\<account_name>\AppData\Local\Google
You’ll find a sub-folder called Picasa2 which contains all your settings. The AppData folder is hidden by default on Windows 7 and later so you’ll probably need to enter this path in the address bar manually. Replace the <account_name> section with whatever your account name is. The image below shows where you’ll need to type the path.
Copy the Picasa2 folder and put it somewhere safe, you’ll need it later. Take a note of where your pictures are currently stored. In my case they are on a mapped drive M: in a subfolder called pictures. Your pictures will be somewhere else, what is important is that you put them back into the same location on the new system.
Step 3 – Reinstall Windows
Do a clean reinstall of Windows and install Picasa. Start Picasa and point it at your pictures. It will quickly scan all your pictures and build a new database. Shut down Picasa
Step 4 – Replace the Database
Notice I pointed out a folder called db3 in the screen shot above. This is the database folder in the Picasa settings and the important one for this process. Find the Picasa settings on your new machine and replace the db3 folder with the one from your backup of the old settings.
When you start Picasa now you should have back all your facial recognition settings, albums, etc.