In part 5 I talked about auto-starting KVM guest machines and setting up a console that could be accessed through virsh. In this section I’ll cover accessing the guest using VNC.
Making a VNC Connection to a KVM Guest
By default when a new virtual machine is installed the host machine sets up a VNC server which gives you access to a console for configuring the machine. This is useful because in the event where you’ve messed up the network settings on the guest you should still be able to access the machine. The VNC sever is set up to binds a port on the 127.0.0.1 address of the host machine – note the bold it’s on the host not the guest. If you have SSH access to the host you can fairly easily set up a tunnel to access the VNC server. On a Linux machine setting up the tunnel should be something like this:
ssh username@192.168.100.100 -L5900:127.0.0.1:5900
Note that this is the access for the first guest machine that comes up. The second machine will be on port 5901 the third on 5902 etc. I’ll explain how to find out what port a particular machine is on in a moment.
While this is quite simple in a Linux machine it’s a little more convoluted on a Windows machine but still quite do-able. Firstly get yourself a copy of Putty and make sure you can shell into the host machine. Now open up Putty and load the settings you use to shell into the host then select Connection > SSH > Tunnels from the settings on the left.
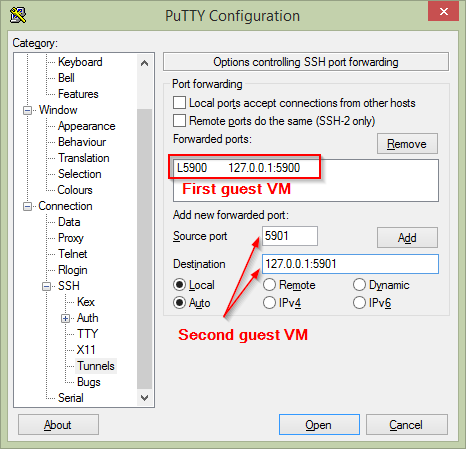
In the “Source port” box (SSH calls this the local port) enter a free port on your local machine. To save confusion it’s a good idea to make this the same as the remote port unless you have a good reason to pick something different. In “Destination” enter the destination IP and port that you want to forward. Note that this IP address and port will be contacted by the remote machine not your local machine. In other words when you specify 127.0.0.1 here you are addressing the loopback device on the host machine. Now press the “Add” button to add the port forward to the list of forwards. As you can see in the image above I’ve already forwarded the port for the first guest machine and I’m adding a second.
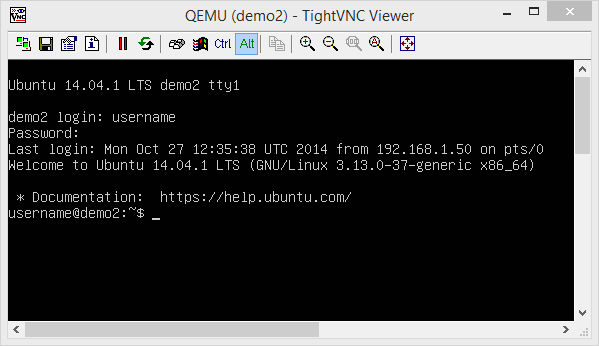
Save your Putty settings and then shell into the host machine. As if by magic Putty will set up the port forwards once you have logged in. Now get yourself a VNC client, I use TightVNC because it seems to work well with the guest machines. I also tried RealVNC but I couldn’t find the magic combination of settings that would make it work. Fire up TightVNC and in the “Remote Host” box enter 127.0.0.1 and press “Connect” after a second or two you should be presented with a console that you can log in at.

I should probably explain why the “Remote Host” box gets a value of 127.0.01. Putty forwards the report port onto the loopback address of the local machine so to access any forwarded ports you have to specify the loopback address. TightVNC (and other VNC clients) will assume that they are to connect to port 5900 if no port is given. If you want to access a something other than the default port you need to specify the port with two colons like this: 127.0.0.1::5901
VNC Access Without Port Forwarding
Using port forwarding to access the VNC consoles of the guests is a good secure way to protect the consoles as only people that can shell into the host can access the guest consoles. If you work in a fairly secure environment though, such as a home office, that can feel like over kill. The solution is to modify the graphics element in the guest settings so that it looks something like this (first start a virsh session and then “edit demo2” as usual):
<graphics type='vnc' port='-1' autoport='yes' listen='0.0.0.0'>
    <listen type='address' address='0.0.0.0'/>
</graphics>
This will cause the VNC server to listen on all the addresses on the host and, presumably, the one you SSH in on. Of course you want to be very careful doing this as it potentially opens all the guest machines to attack via their console. One way to tighten up the security would be to limit the source addresses allowed access to the VNC ports using iptables. Additionally you can specify a password on the VNC server but I’m not sure how much I would rely on that.
What Machine is On What Port
A slight problem with this VNC set up is that it’s not immediately obvious which machine is on which port and it can change when the host is restarted or machines come and go. The quickest way to determine what port a machine is on is to start a virsh session and enter:
virsh # vncdisplay demo2
127.0.0.1:0
The :0 indicates that it’s the first VNC display and therefore should be on port 5900. Essentially you just want to add whatever number is after the colon on to 5900 to determine the port number.
An alternative method is to run the following command:
$ sudo netstat -tunelp | grep LISTEN
tcp        0      0 127.0.0.1:5900          0.0.0.0:*               LISTEN      105        11158       1390/qemu-system-x8
tcp        0      0 0.0.0.0:22              0.0.0.0:*               LISTEN      0          8961        1036/sshd
tcp6       0      0 :::22                   :::*                    LISTEN      0          8963        1036/sshd
This give you a list of the processes that are listening on sockets on your machine with the last column showing the PID of the process. Take the PID and plug it into this command:
$ ps ax | grep 1390

 1390 ?        Sl     0:22 qemu-system-x86_64 -enable-kvm -name demo2   ...snip...
 1391 ?        S      0:00 [vhost-1390]
 1394 ?        S      0:00 [kvm-pit/1390]
 1427 pts/1    S+     0:00 grep --color=auto 1390
The first line of the output is the process that is listening on the socket and reading the argument it was started with shows us that it’s “demo2” running on that port.
In the final part of this series on installing KVM on Ubuntu I discuss installing a desktop system and configuring it for X2Go access.
Read More