Database connection pools are by far the simplest and quickest way to get a database connection from a JEE application. This article describes how to set up a new connection pool in GlassFish 3.1. Version 3.0.x of GlassFish used configuration screens that were very similar but in a slightly different place in the menu.
The first step is to start the connection pool wizard so login to the administration site and navigate to: Resources > JDBC > JDBC Connection Pools. You will see a table listing the currently configured connection pools. Press the new button at the top of the table. The New JDBC Connection Pool wizard starts as shown below:
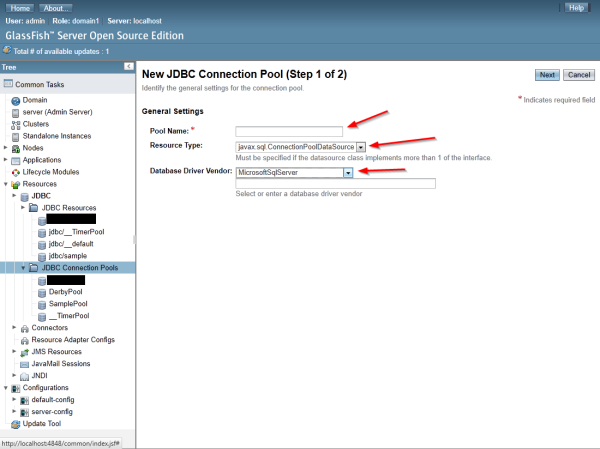
Provide a descriptive name in the first box, I normally end my pool names with “Pool” so that they are easily distinguished. As a resource type try and use ConnectionPoolDataSource if you know your database drivers support it (most now do) since it will be the best performing option normally. Finally select your database vendor and press “Next”.
The second step displays all the settings for your newly created connection pool. Generally these can for the most part be left alone. Notice that the driver class has been selection for you and that I’ve turned on ping. I’ve highlighted the driver class selection because in the case of Microsoft SQL Server (at least with the drivers I’m using here) GlassFish provides the wrong classname. You have the option of typing in the classname below but I’m lazy so I leave it set incorrectly for now.
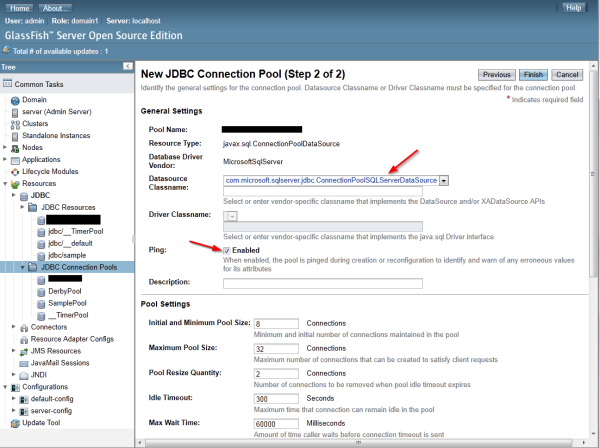
Now scroll down the page a little and enter the additional connection settings.

I normally only fill in portNumber, databaseName, serverName, user and password. You can probably get away with not filling in portNumber and serverName if you are running on localhost and the default port. Note that different database types provide different numbers of possible settings here. MS SQL Server provides very few, MySQL provides a lot. When you are finished press the Finish button.
You will now be taken back to the JDBC Connection Pool listing screen and there will probably be a ugly warning message at the top telling you the classname was wrong. To fix this select the newly created connection pool and enter the new name.
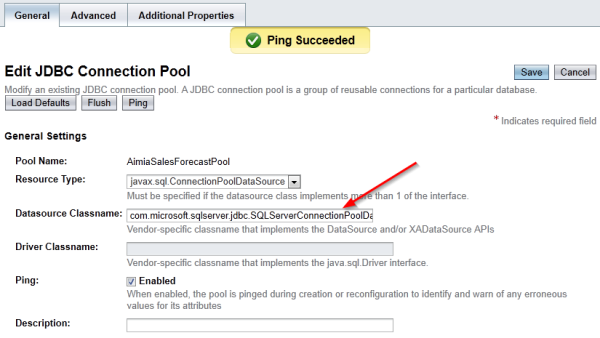
In the case of Microsoft SQL Server and the drivers I am using the correct name is: com.microsoft.sqlserver.jdbc.SQLServerConnectionPoolDataSource. Once you have filled it in press save and then the Ping button. If all is correctly configured you are greeted with a “Ping Succeeded” message.
In order to expose this newly created connection pool to the rest of the system create a new JDBC Resource with a JNDI name. This is done by navigating to: Resources > JDBC > JDBC Resources where you will find a list of the currently configured resources. Press the New button.
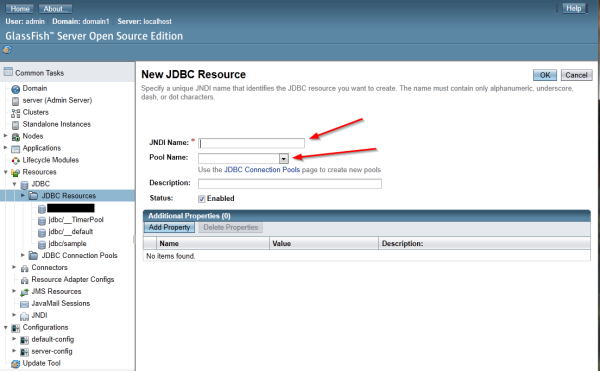
Enter a JNDI name for your resource. Since it is a jdbc resource start the name “jdbc/” after than you can enter whatever name you like. For example: “jdbc/myConnectionPool”. Next select which pool this JNDI entry will expose to the system and finally press Ok. That’s all there is to it. In order to use your connection pool you’ll need to do a JNDI look up in your application like this:
Context ctx = new InitialContext();
DataSource dataSource = (DataSource) ctx.lookup("jdbc/" + getDataSourceName());