Now that we have created the project it’s time to throw caution to the wind and just start writing some code! Right click on the example.simpleproject node under Source Packages and select new… then Java Class. Call the class QuoteBean or some such – it has been common to call classes such as this SomethingBean but that practice seems to be falling by the wayside as so many classed now follow bean patterns.
Annotate the class with the javax.inject.Named annotation as shown
here:
package example.simpleproject;

import javax.inject.Named;

@Named
public class QuoteBean {

}
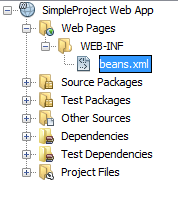
The annotation tells the server that this is a managed bean but we also need to tell GlassFish that this project contains managed resources. To do that simply create the WEB-INF directory under the Web Pages node and then create a completely new XML file called beans.xml. The beans.xml file should contain just the mark up shown below.
<?xml version="1.0" encoding="UTF-8" ?>
<beans xmlns="http://java.sun.com/xml/ns/javaee"
    xmlns:xsi="http://www.w3.org/2001/XMLSchema-instance"
    xsi:schemaLocation="http://java.sun.com/xml/ns/javaee
        http://java.sun.com/xml/ns/javaee/beans_1_0.xsd">
</beans>
The beans.xml file lets GlassFish know that it must start and configure the CDI system (provided by JBoss Weld). The file can also contain mark up which supplements or replaces class annotations but this is less common.
We now have everything we absolutely need so it’s time to configure the server. Right click on the project node and set it as the main project (this just makes life simpler) and then right click again and select Properties. Select the Run page and set the server as GlassFish Server 3.1 which is installed along with NetBeans 7.0. I also uncheck Display Browser on Run as it annoys me when it pops open a new window every time the application is launched. We’ll also be using the compile on save feature which allows for hot deployment of code so go to the Build > Compile page and select “For both application and test execution” from the Compile on Save drop down.
My personal view of compile on save is that it should be left at it’s default of “For test execution only” because it’s not fast enough to make it worth the hassle for regular application development. We’ll leave it on here because it’s a nice feature to show off and this is such a small application it should be fast enough.
On clicking Apply you’ll notice that a new file called glassfish-web.xml is created under the WEB-INF directory, this file is used to configure the GlassFish server but we will just accept the defaults for now (note: this file was called sun-web.xml before GlassFish 3.1 – presumably the name changed because Oracle bought Sun).
Start the application by clicking the big green run button at the top of the NetBeans window. The initial run of a project is somewhat slower than most as Maven downloads prepares all the plugins and what-nots that are used by the project subsequent starts of such a small project will typically be less than half a second.
Although we have now deployed our application to the server it has no methods to call or pages to view so it’s a fairly dull application at this point. One of the great things about JEE6 is the ability to hot update an application without the need to manually redeploy so right click on the Web Pages node and select New > Other > JavaServer Faces > JSF Page and create a page called “index.xhtml” – leave Facelets selected. Modify the page so that it looks like this:
<?xml version='1.0' encoding='UTF-8' ?>
<!DOCTYPE html PUBLIC "-//W3C//DTD XHTML 1.0 Transitional//EN" "http://www.w3.org/TR/xhtml1/DTD/xhtml1-transitional.dtd">
<html xmlns="http://www.w3.org/1999/xhtml"
      xmlns:h="http://java.sun.com/jsf/html">
    <h:head>
        <title>Facelet Title</title>
    </h:head>
    <h:body>
		Hello from Facelets
		<br/>
		#{quoteBean}
    </h:body>
</html>
All we’ve changed is to add a line break and #{quoteBean}. View the page by going to http://localhost:8080/SimpleProject/ – change the port or address if yours is different. The #{quoteBean} calls the toString() method of the QuoteBean class which means that at the moment we get this rather uninspiring output on the page:
Hello from Facelets
example.simpleproject.QuoteBean@15ce859d
What we want to see, of course, is a famous quotation so now we’ll add a method to the QuoteBean to produce a quotation for us. Remember, there’s no need to stop the server to make this modifiction, as soon as you save the source file you’ll see a deployment progress bar in the bottom right of the NetBeans window. Once this progress bar disapears (you may miss it as it will only take a second to redeploy) you can call the new method from your JSF page. Modify the QuoteBean to this:
package example.simpleproject;

import javax.inject.Named;

@Named
public class QuoteBean {

	public String getQuote() {
		return "A picture is worth a thousand words - Napoleon Bonaparte";
	}

}
Finally modify the #{quoteBean} call in the JSF page to #{quoteBean.quote}. This tells it to call the method getQuote() on the QuoteBean class. Refresh the page with F5 and bask in the glory of a job well done.