I recently treated myself to a new hard drive as I was running out of space. I decided to go with a Seagate external drive and shuck it for my server. Shucking is the act of removing a drive from an eternal drive enclosure and fitting it somewhere else such as a NAS. I’ve not shucked a drive before and I must admit to being a little nervous about tearing open the £250 drive enclosure I’d received just an hour or so earlier. The Seagate enclosure is particularly tough to get into due to the number of clips but you’ll usually find a completely standard SATA drive inside. Many people shuck Western Digital external drive but, from what I’ve read, these often yield drives that need a minor tweak to make them show up in regular machines. As for the drive I shucked, I got really lucky and found an Seagate Exos drive inside.
Checking the Drive is Good
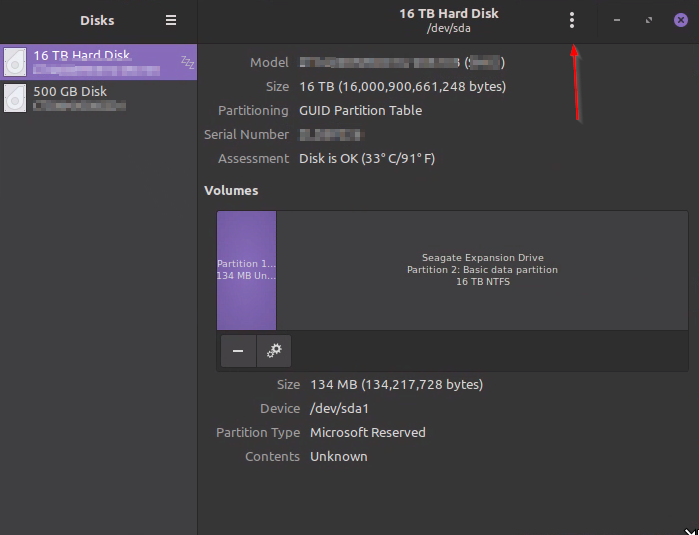
Once the new drive was fitted into the machine I opened up the Disks utility (Menu (Start)> Preferences >Disks) to verify the drive was found.
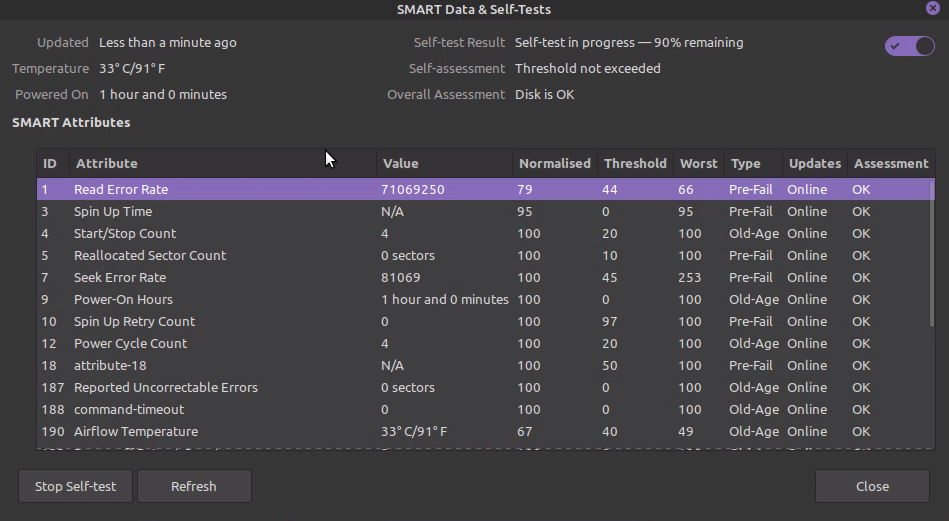
I then performed some SMART self tests on the drive. The user interface is a little unintuitive here; first select the drive and then click the three dot menu at the top of the screen and select SMART Data and Self-Tests. At the bottom left is a button that will let you select the type of self test. You can select from:
- Short: verifies the major components of the hard disk (heads, servos, electronics, memory, etc). This test will take a couple of minutes to run.
- Extended: perform a short test and then carries out a full surface scan which should find all bad sectors that need remapping. On a large drive this will take a long time to run.
- Conveyance: this test isn’t supported by all drives but it runs manufacturer-specific tests to verify the mechanical parts of the hard disk. This test is best run when the drive is first delivered as it is designed to find damage that occurred during shipping. This test will take a few minutes to run.
Note that none of the tests are destructive, they all leave the data on the drive intact.
Benchmarking the Drive
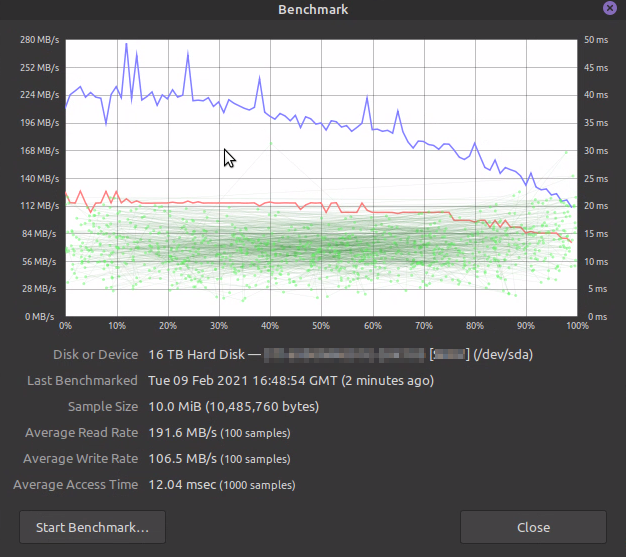
In the Disks utility, with the drive selected, click the three dots at the top of the window and select Benchmark Disk. Run the suggested benchmark. Note that the drive can sound a bit like a rain storm when performing a test with small random blocks (e.g. access time test), this is caused by the head moving about very quickly. My results can be seen below and for a single mechanical drive these figures look about what I’d expect for the test I performed.
Formatting the Drive
Now that I’m happy the drive is fine it’s time to format it in a way that is more Linux friendly. If this had remained an external drive I’d probably have left it as NTFS as that’s widely supported but since it’s now an internal drive on a Linux system Ext4 is a better choice. There are numerous ways to perform the following step, Gparted is what I usually use to manipulate disks but today we’ll do it through the Mint Disks utility.
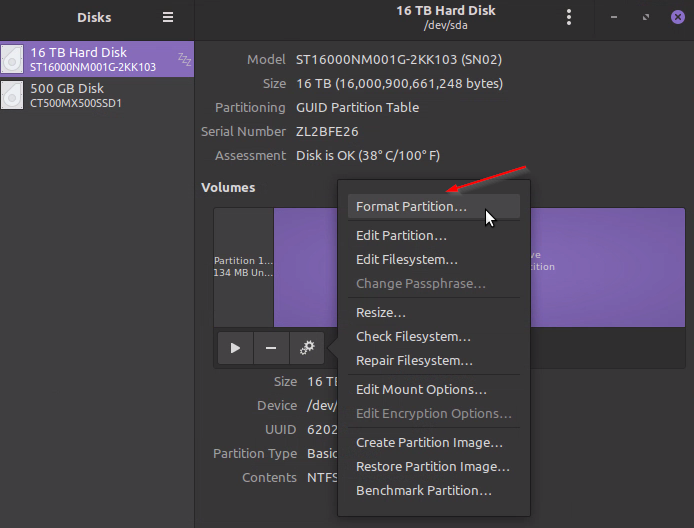
Select the partition you want to format and click the gears icon below it, select format partition.
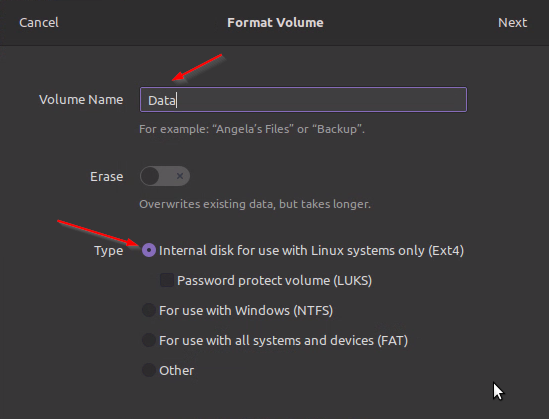
Fill in a volume name (I chose Data) and set the type as Ext4 then press next.
You’ll be presented with a warning about losing all the data on the volume, if you are sure you have the correct partition selection press format. You’ll need to enter your administrator password to confirm the format operation. Since we selected a quick format (which doesn’t delete all the data on the drive) it should only take a couple of minutes.
Note, if that small partition at the start irritates you then you can also choose to format the whole drive from the top three dots menu. There’s a couple of extra steps but the formatting is the same and you’ll get an extra 0.0008% drive space. Yes, I did this because it bugged me.
Mounting the Drive
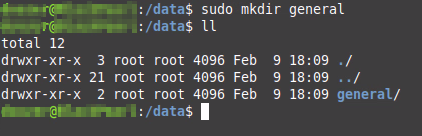
All that’s left to do is mount the drive. In the past I’ve always just put an entry in /etc/fstab but today I’m going to try out the Disks GUI route. This drive will be for media such as films and music so I’m going to start by creating a folder in the root directory called “data” and then a sub folder called “general” – I can’t call the data directory “media” as that’s already taken for automatically assigned temporary mounts. Why the two level directory structure? I might end up adding a drive specifically for films in which case I would have “/data/films” and “/data/general”.
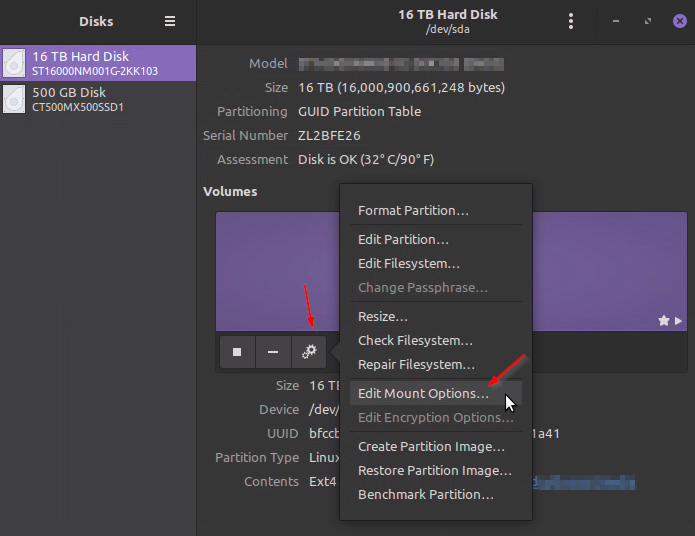
With the correct partition selected click the gears button and select “Edit Mount Options…”
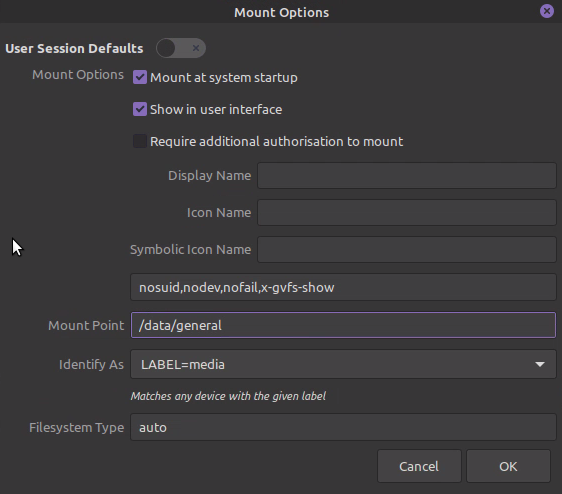
This will option the Mount Options window which is somewhat confusing. By default the User Session Defaults is turned on, this causes the drive to be automatically mounted and appear under your user account (I think). Turn this off to provide hard / permanent mounting options.
Make sure that “Mount at system startup” and “Show in user interface” are checked. Set the mount point to the directory you created earlier and select and Identify As name. Click ok and enter you password to write away changes.
If you open a command prompt and run “sudo cat /etc/fstab” you’ll see a new entry at the bottom for the mount you’ve just created.
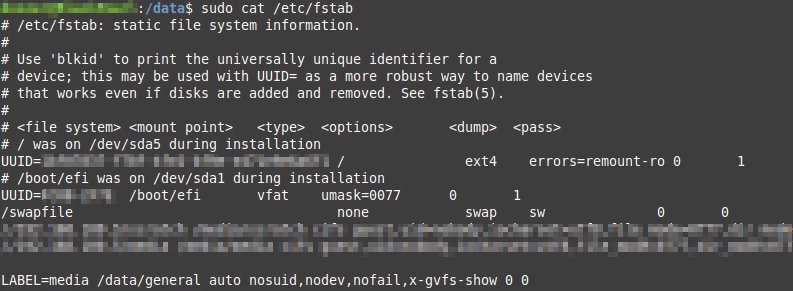
Since you are using a decent operating system you can now run “sudo mount -a” to mount the drive at it’s new location. I noticed that Mint got a little confused at this point and gave me two identical desktop icons for accessing the drive, I assume one was the auto-mounted one that didn’t get cleared up. It was gone after a reboot.