When you install Proxmox it’s quite common to choose just a single local disk and let the installer use LVM to partition it. This turns the drive into a physical volume (PV) onto which the installer will create a single volume group (VG) called pve. Inside that volume group the installer will create three logical volumes (LV): root, swap, and data. This can seen using the pvs, vgs and lvs commands which list physical volumes, volume groups and logical volumes respectively.
# pvs

  PV             VG  Fmt  Attr PSize    PFree
  /dev/nvme0n1p3 pve lvm2 a--  <931.01g 15.99g

# vgs
  VG  #PV #LV #SN Attr   VSize    VFree
  pve   1   3   0 wz--n- <931.01g 15.99g

# lvs
  LV   VG  Attr       LSize    Pool Origin Data%  Meta%  Move Log Cpy%Sync Convert
  data pve twi-aotz-- <794.79g             0.00   0.24
  root pve -wi-ao----   96.00g
  swap pve -wi-ao----    8.00g
As you can see, the pvs command shows us that we have one physical volume and it’s on a 1TB NVMe drive. The vgs command shows us that we have a single volume group called pve which contains three logical volumes. The lvs command finally shows us the details of the three logical volumes.
Notice that the output of the lvs command includes detail attributes about the logical volumes we have and that the data logical volume stands out as it’s marked with a ‘t’ at the start (if you are interested in the other attributes for the volumes check out the lvs man page.). This t indicates that the data LV is thin provisioned pool. Thin provisioning is how LVM supports growing and shrinking a logical volume. Rather than allocating all the blocks to a volume at creation the thin pool allocates blocks to it’s child volumes as required. To keep track of the allocated blocks a separate meta-data area is required. These separate areas can be seen if we run the lvs command with the all flag:
# lvs -a

  LV              VG  Attr       LSize    Pool Origin Data%  Meta%  Move Log Cpy%Sync Convert
  data            pve twi-aotz-- <794.79g             0.00   0.24
  [data_tdata]    pve Twi-ao---- <794.79g
  [data_tmeta]    pve ewi-ao----    8.11g
  [lvol0_pmspare] pve ewi-------    8.11g
  root            pve -wi-ao----   96.00g
  swap            pve -wi-ao----    8.00g
Now you can see that we have a storage area, data_tdata, of a little under 800GB, a meta-data area, data_tmeta, of about 8GB and a spare area, lvol0_pmspare, also of about 8GB. My understanding is that technically this spare area can be removed and the system will continue working but it dramatically increases the risk of an an unrecoverable error. Essentially the system is storing a copy of the meta-data in this area which is used if a recovery is needed due to corruption of the main meta-data store.
The size of the meta-data provision is important to a correctly functioning system but unfortunately it’s not possible to predict ahead of time exactly how much meta-data space will be required. It is possible to increase the size of the meta-data store if it turns out to not be large enough. From what I have read I think 8GB should be enough for the amount of data space I have. It seems there is an upper limit of 16GB for meta-data. The amount of meta-data stored is related to how you use the drive e.g snapshots take meta-data space.
Looking at the Proxmox web UI you can see most of the same information shown above. Selecting Datacenter > [Host] > Disks > LVM shows the volume group (pve) with the physical volume it is on (/dev/vnme0n1p3). It also indicates we have three logical volumes in this volume group and that they take essentially all of the drive.

Selecting Datacenter > [Host] > Disks > LVM-Thin then shows us just the data logical volume. Notice that it gives information on both the storage space used and the meta-data space used. Don’t forget to keep an eye on the meta-data usage.

This now brings us onto the storage defined in Proxmox and how it interacts with the underlying storage. On a default install you’ll find two storage containers defined local and local-lvm. In the web UI they are presented like this:
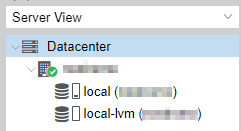
The local storage maps to the /var/lib/vz directory in the root partition and it used for storing things like backups and ISO images. The local-lvm storage points at the data partition that is thin provisioned as described above and is used for storing guest images. The data storage location can’t store files because it’s a block pool not a filesystem, it’s a location for creating thin logical volumes and then putting file systems on them. This is why the lvm-thin is such a good fit for storing guest images. The arrangement we have overall is summed up like this:
drive -> partition -> PV -> VG -> LV 'root' -> ext4 mounted on / -> directory /var/lib/vz configured as 'local' storage
                               ∟> LV 'data' -> LVM thin pool configured as 'local-lvm' storage
My plan, at the moment, is to store all my VM’s on this drive as it’s fast and almost certainly large enough for my needs. Most VM’s only require a few GB in my experience. Even if we say they require 40GB each I’m still in the realms of 20 VM’s which is far more than I can imagine having.