In this article I’ll be installing Pi-Hole on Proxmox. Pi-Hole is a DNS sinkhole or blackhole that can effectively block ads and other unwanted content. It works by replacing your usual DNS server with Pi-Hole and then dishing up non-routable addresses for unwanted content based on a block list. In this article we’ll be installing Pi-Hole into a container. An alternative option is to use Docker but that would require a full virtual machine as Docker shouldn’t really be run in an LXC container.
Create a Debian LXC Container
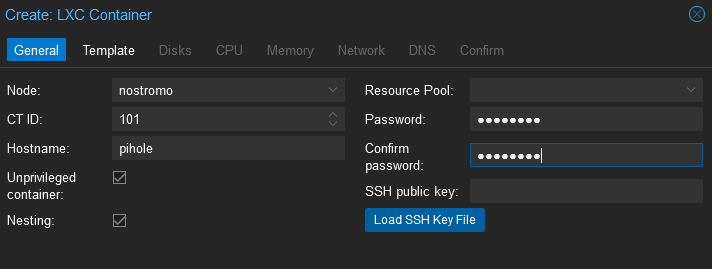
As in previous articles I won’t go into much detail here as the official documentation is good. Suffice it to say I’ll be creating a Debian 12 container as that is the latest version available. Naturally, I’ve given the container the hostname pi-hole. It’ll also need an 8GB disk (which I created on local-lvm) and 512MB RAM. As this is a server it gets a static IP address.
You’ll want this container to start automatically with the system so once it’s created select it in the left menu, and then options from the middle menu. In the options list change start at boot to yes. Now open a console on the container and perform a full update and then install curl.
root@pi-hole:~# apt update && apt upgrade -y
root@pi-hole:~# apt install curl -y
Installing Pi-Hole
Surprisingly, Pi-Hole doesn’t have an official Debian package although looking around it seems there might be an unoffical one available. It seems most people either use the Docker image or follow the official install instructions which just downloads and runs a script. Note, running scripts from the Internet is a bad idea, you should inspect them first! At a command prompt run:
curl -sSL https://install.pi-hole.net | bash
This will start the Pi-Hole installer which is quite self explanatory for the most part. For the upstream DNS provider I selected Google. I already run my own DNS server on my router but I plan on switching to Pi-Hole to manage my personal DNS. I used the recommended blacklist and installed the web interface along with it’s required server. I turned on query logging for now but I might switch this off in the future. If you use logging you’ll be asked about what privacy level you want (FTL is the DNS resolver in Pi-Hole) you can always change this later. After the privacy question is answered the system performs the bulk of the install.
If all has gone to plan the last page of the setup will tell you to set your devices to use Pi-Hole as their DNS server and how to open the web interface. It also, crucially, tells you what the admin password has been set to.
Change the Password
You’d think that you could change the password through the web interface but apparently it’s a command line only option. Open a command prompt and enter the command below. Note that this isn’t as insecure as it looks as it requires either sudo or a root shell.
pihole -a -p
Switching Over to Pi-Hole
The most comprehensive way to switch over to Pi-hole will be to update your DHCP server to hand out your new Pi-hole IP as the source of DNS. Depending on how you have your network arranged and how much you have to avoid screw ups that may or may not be a good idea. Personally, I updated one machine manually first just to see how the system worked – it was flawless as far as I could tell.
Adding Custom Local DNS Entries
Pi-hole not only acts as a DNS server for answering queries, you can also enter your own results for it to dish up to your local network. This is really useful if you run a home server as you don’t need to remember a ton of IP addresses. Under Local DNS > DNS Records add the full address you want to resolve e.g. myserver.example.com and it’s IP address.
Alter the DNS Settings for Proxmox
One of the last things you’ll want to change are the DNS settings for Proxmox. Since Proxmox is a key part of your setup it should have manually set settings. Select the server you want to modify in the left menu and then System > DNS in the middle menu. Update as required. Note that this settings just changes the file /etc/resolv.conf.
Updating Pi-hole
Updating Pi-hole is simply a matter of opening a console on the container and entering:
pihole -up
That’s it, you are now filtering ads like a pro. I highly recommend the official documentation for Pi-hole, it’s very well written.