I thought migrating from Nexus to Artifactory would be a seriously painful process but it actually turned out to be quite simple. My biggest concern was maintaining my release history as it would be impractical to try and move hundreds artefacts by hand. The article below describes the process I used.
Migrating from Nexus to Artifactory
First find your Nexus storage folder, the exact location will vary depending on where you installed Nexus but it will probably be called something like sonatype-work. Now drill down to nexus and then storage where you will find the root of all the repositories. Tar and gzip the repository you want to move:
sudo tar -zcvf releases.tar.gz releases/
In my case I wanted to move my releases repository first. Now shell into your Artifactory machine (assuming you are moving to a new machine) and SCP the repository over and expand it:
scp [email protected]:/some/path/sonatype-work/nexus/storage/releases.tar.gz .
tar -zxvf releases.tar.gz
In theory you can import a zip file repository but that is discouraged in the documentation and I suspect it would only work for a very small repository. Once the archive is expanded change into the base directory of the backup and delete .meta, .nexus, .index and archetype-catalog.xml. You can import these files as well but you’ll just end up deleting them from within Artifactory.
Next, log into Artifactory and go to: Admin > Import and Export > Repositories and fill in the Import Repository from Path as shown below:
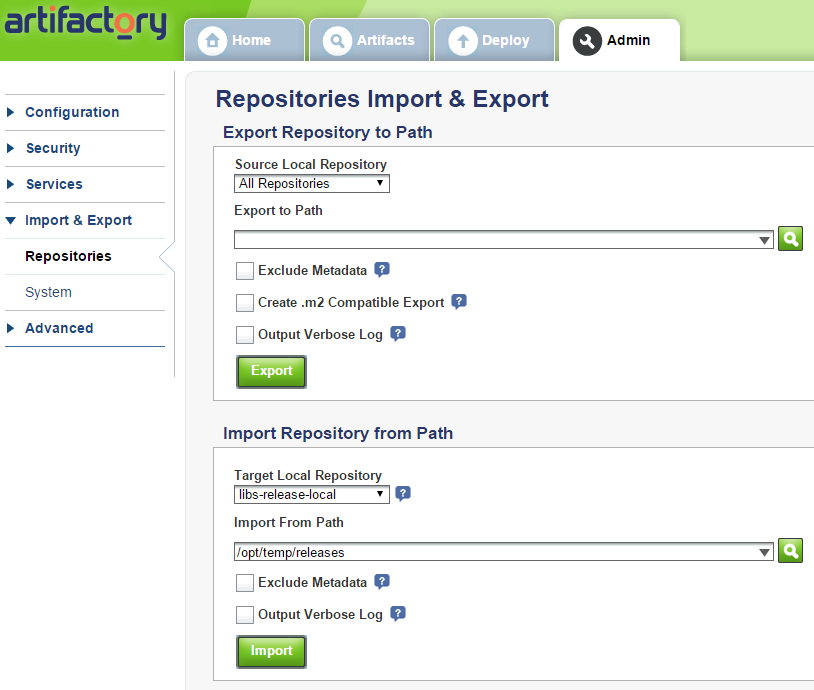
If, like me, you are importing your releases choose libs-release-local as the target local repository. Click the import button and sit back while the artefacts are imported, it takes a while on a large repository. If you switch back to the Artifactory home screen you should now find that there are a few hundred more artefacts available. You have now completed migrating from Nexus to Artifactory, at least for one repository.