I’m running a MikroTik RouterBOARD 962UiGS-5HacT2HnT with a level 4 license. This set up should work on any level 3 or higher licensed version of RouterOS which I think is now all of them.
I’m setting this up using WinBox, it can also be done using the web interface and the command line.
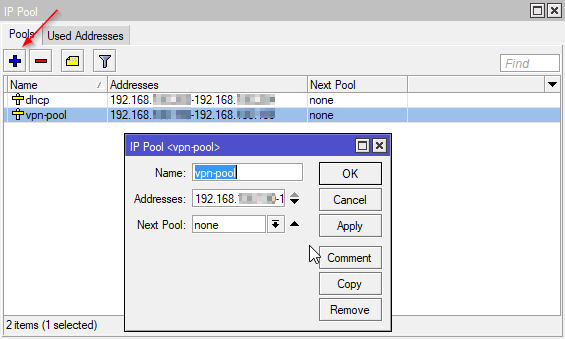
Add an IP Pool
You need to set aside a range of addresses that will be assigned to VPN clients. To open the IP Pool window: IP > Pool I’ve picked a small section of my usual DHCP assigned block. There’s little point in making this block large as this router can only handle a couple of concurrent VPN sessions at most. Call the pool something like “vpn-pool” and give it an address range such as “192.168.1.240-192.168.1.254”. Leave next pool as none.
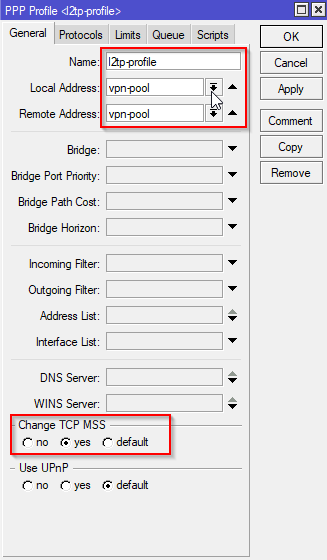
Add a PPP Profile
Open the PPP window. Select the Profiles tab. Click the add button. Make the settings as shown.
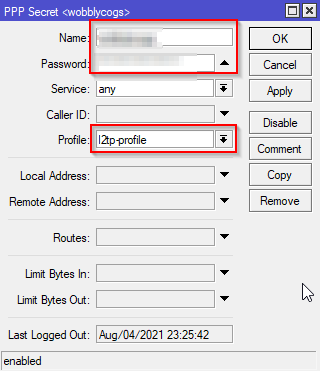
Create a PPP Secret
You need to create one or more PPP Secrets which are used by the users. In the PPP window select the Secrets tab and click the add button. Fill in a name and password (choose a good password) and then select the profile as shown. The service can be selected as L2TP is required or just left as all.
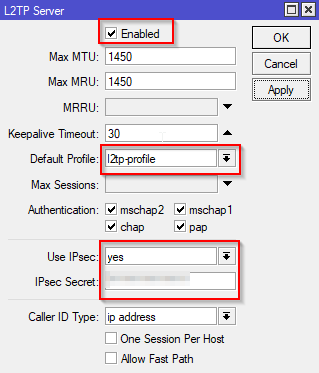
Enable the L2TP Server
In the PPP window select the Interface tab and click the L2TP Server button. Enable the server, set the default profile to the one you just created and then turn on and set an IPSec Secret (a pre-shared key).
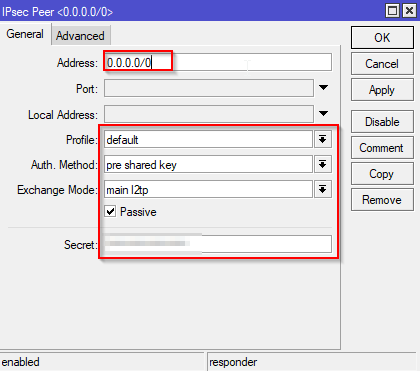
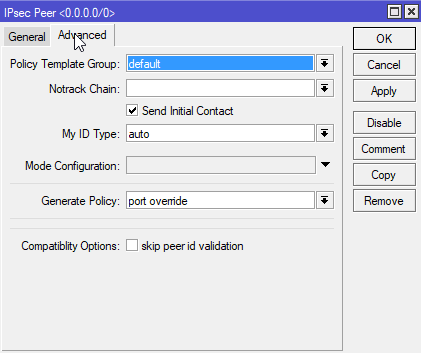
Set up IPSec Peers
Open the IPSec window: IP > IPSec and switch to the Peers tab. I’m honestly now sure how important this step is. The router reports that the configuration is unreachable, I think because the default configuration already covers this. Here are the settings I made anyway. Note you need to re-enter the IPSec secret although the default configuration appears to have picked it up automatically.
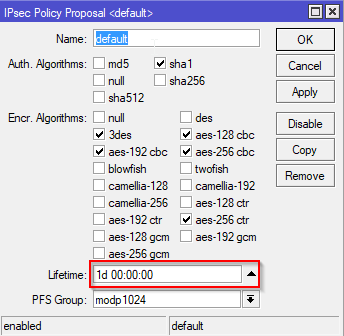
Add Proposals
On the IPSec window select the Policy Proposals tab. Double click the default entry and make the settings as shown. The only interesting change here is to set the lifetime longer although that’s not necessary (and possibly bad).
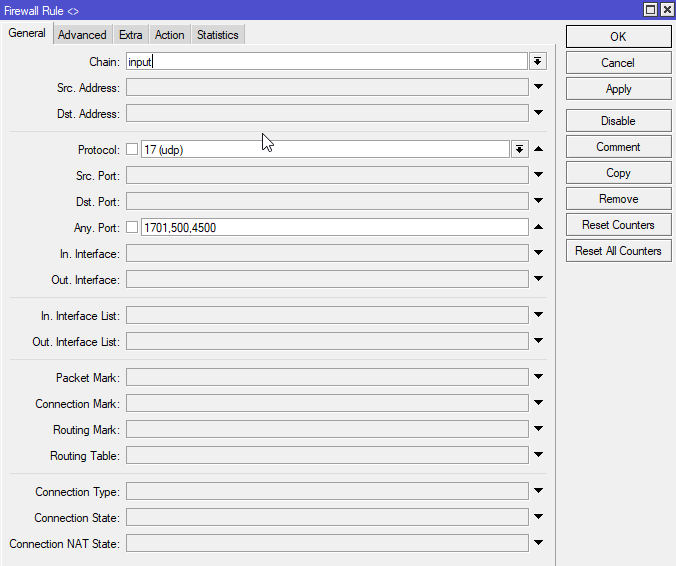
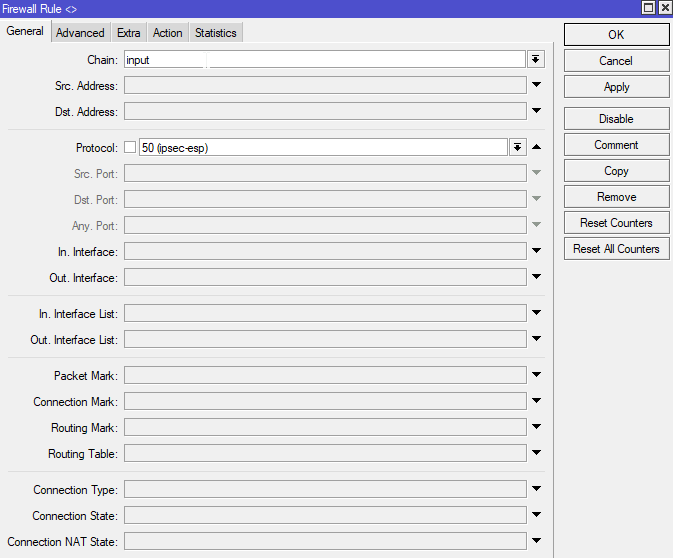
Add Firewall Rules
Open the Firewall Rule window: IP > Firewall click the add button and then add two new rules. Both should be set to “accept” on the Action tab (with no other settings on that tab).
Frist Rule
Second Rule
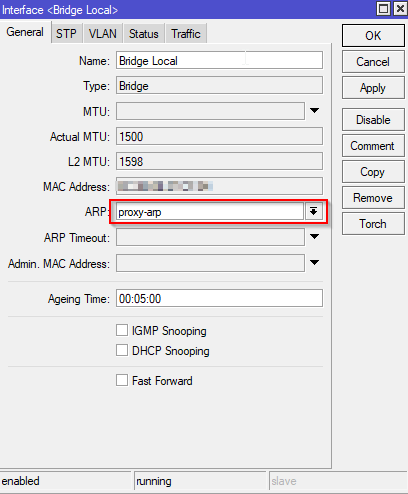
Turn on Proxy ARP
Open the Bridge window and double click the bridge configuration. Set ARP from “enabled” to “proxy-arp”, if this setting isn’t made you’ll be able to VPN in but you won’t be able to access resources on the network.
That should be all you need to access resources on the local network when VPN’ed in. As far as I know all even vaguely recent versions of Android have VPN capabilities built in. For the above set up you want to select a VPN type of L2TP/IPSec PSK, enter your server address and the IPSec pre-shared key. You’ll also need your username and password as entered in the “Secrets” section. Set the DNS server for this VPN to the DNS server of the router your VPN’ing into to (you’re internal DNS) and set the forwarding routers to “192.168.1.0/24” or whatever your internal network is.