In an earlier article we installed OMV and did the most basic set up. In this article we’ll add a storage drive. This article assumes you have a Raspberry Pi 4 with OMV 6 installed and working correctly. We’ll be attaching a USB hard drive which has an NTFS partition on it.
Attaching a Drive and Wiping It
Since this is a Raspberry Pi we’re working with the drive is attached via USB3 and most drives like that come with a filesystem already installed. In our case we’re attaching a 4TB portable (2.5″ drive) which is formatted as a single NTFS partition. While we can certainly mount this on our Raspberry Pi we’re asking for trouble in the long term as file permissions will become a pain to deal will – much better to just use EXT4 or one of the other natively supported file systems.
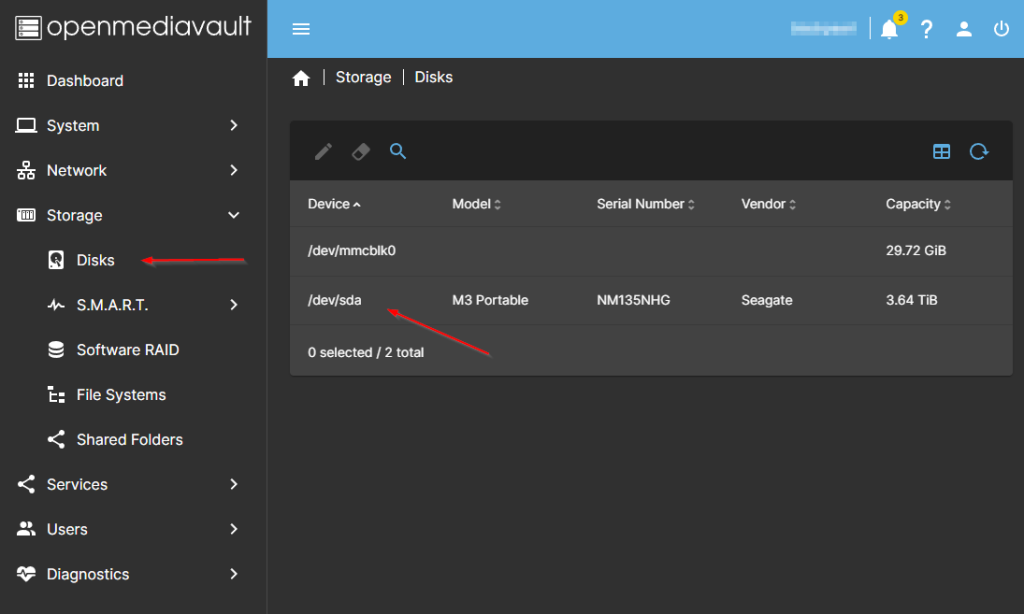
OMV 6 has basic tools to remove the existing partitions and create new ones but it’s not entirely clear that they exist. From the home page select Storage > Disks in the menu. You’ll be presented with a list of the disks attached to your device. In my case it’s just two. The mmcblk0 device is the SD card which store the operating system and sda is the attached USB drive.
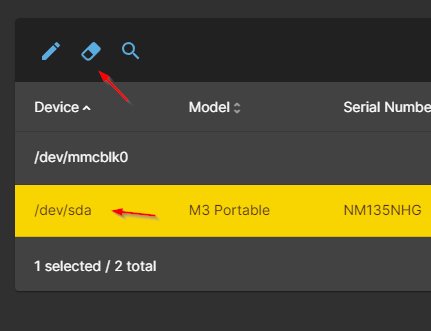
Select the drive you want to work with and then click the “Wipe” button in the tool bar.
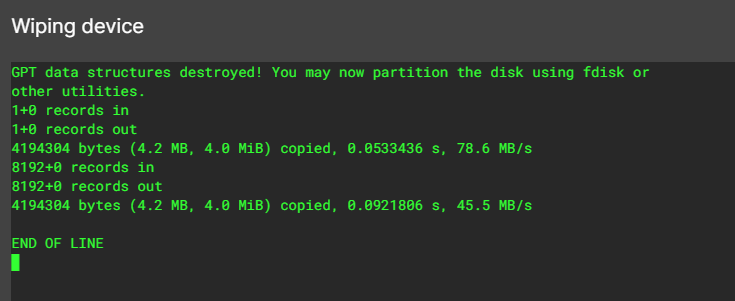
Naturally, you’ll be asked to confirm that you want to wipe the drive. You’ll then be asked if you want to perform a quick wipe or a secure wipe. A secure wipe will take a long time and we just need the existing drive structure gone so select quick. You’ll then see output looking something like this:
Creating a Filesystem
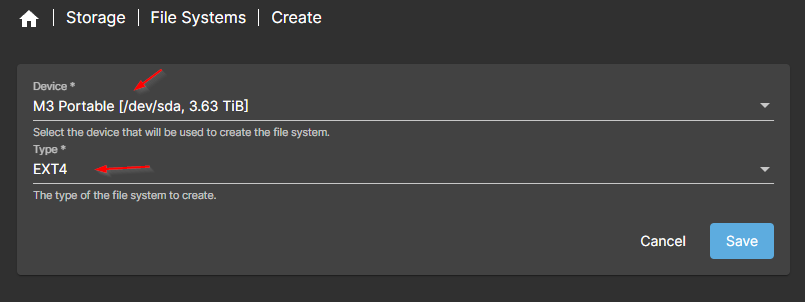
Select Storage > File Systems from the menu and then click the + create / mount button in the menu. Select Create from the options list. On the creation settings page select the drive you’d like to create a file system on (/dev/sda in our case) and the file system type. The file system type you choose depends somewhat on what you want to do with the drive. Since this is just a storage drive EXT4 is a good choice. When you’re ready press “Save”.
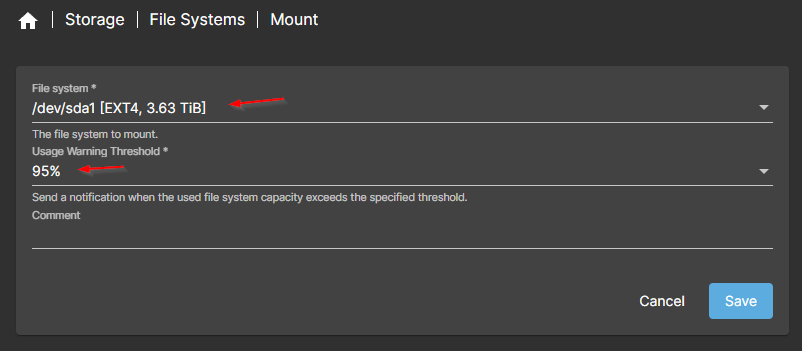
Since we’re changing the format of the drive it has to be completely formatted which will take a while, at least 10 minutes on a drive of this size. You’ll see a dialog with progress while they system works. When the process is complete close the dialog, this automatically opens the mount settings. Select the drive you’ve just formatted. Optionally set a warning threshold, I prefer 95% as I find after the initial load the amount of data grows quite slowly. When you are done press Save.
OVM will ask you to confirm you want to mount this file system and then ask you to commit the pending configuration changes. If you now run “lsblk -f” at a terminal you’ll see something like this:
NAME        FSTYPE FSVER LABEL  UUID                                 FSAVAIL FSUSE% MOUNTPOINT
sda
└─sda1      ext4   1.0          bce70b03-1c0e-4a59-81de-fa981a17c482    3.6T     0% /srv/dev-disk-by-uuid-bce70b03-1c0e-4a59-81de-fa981a17c482
mmcblk0
├─mmcblk0p1 vfat   FAT32 boot   0F92-BECC                             224.5M    12% /boot
└─mmcblk0p2 ext4   1.0   rootfs 41c98998-6a08-4389-bf74-79c9efcf0739   25.1G     9% /
Creating a Shared Folder
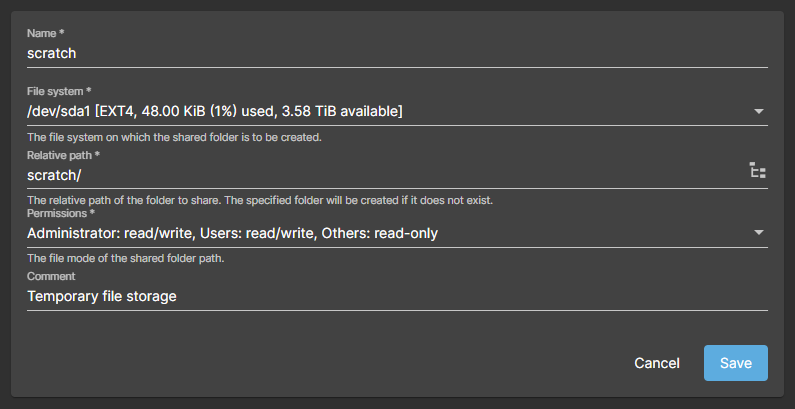
I’m planning on creating a number of shared folders. There will be one for family photos and videos, one for each family member and a shared scratch drive. For this tutorial I’ll set up the scratch drive. Click Storage > Shared Folders on the menu and then click the + on the toolbar to create a new shared folder. Enter a name and pick the drive you want this share to be created on. In my case the name is “scratch” and I want it on /dev/sda1, the drive I’ve just formatted. The system automatically suggests a relative path, this is almost always fine. Set permissions as needed, for most cases the default will be fine, these are file level permissions. Click Save when you are done. You will be asked to save pending configuration changes.
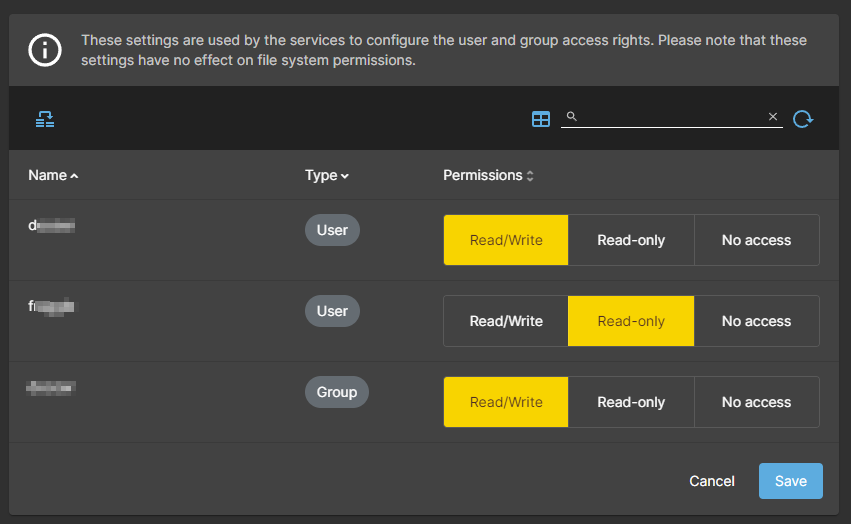
Now select the newly created shared folder and click privileges in the toolbar. You have to grant privileges to everyone that you want to be able to access the share if you are using Samba, FTP or AFP (NFS works differently). Give yourself, for example, read/write permissions to access the scratch share. These aren’t file level permissions, you can think of this as a layer above that which grants access to the share at all. For example, with the permissions shown below, the “d” user has read/write access to the share and the “f” user can only read files even though “f” is a member of the user group and they have write permissions. You can also block access to a user by selecting No Access. When a user is created in OMV they will appear here but no option will be set, this is the equivalent of no access.
Setting up a Samba SMB/CIFS Share
While you’ve created a shared folder you’ve not actually set up sharing yet as there are no services configured to provide access. Select Services > SMB / CIFS > Settings from the menu. Check the Enabled checkbox to turn SMB sharing on, this will give Windows clients access. Then click Save, as usual you’ll be asked to save pending changes.
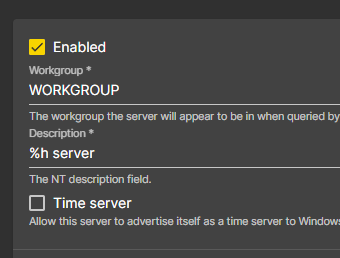
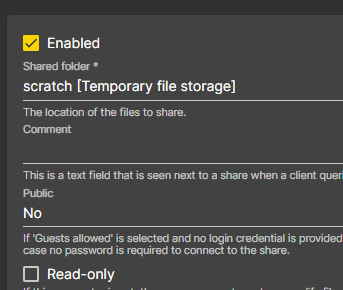
Now select Services > SMB / CIFS > Shares from the menu and click the + create on the toolbar. Check the Enabled checkbox and leave all the other settings at their default values for now. Click Save and apply the changes.
The share is ready to use. From Windows Explorer you can access the share by entering “\\IP_ADDRESS\scratch” where IP_ADDRESS is the address of your server. You can also mount the share on the command line which is shown below. Open a powershell prompt and enter the following command – alter the IP address as needed and change the drive mapping from “x” if needed.
PS C:\Users\username> net use x: \\192.168.100.27\scratch /user:doozer
Enter the password for 'doozer' to connect to '192.168.100.27':
The command completed successfully.
You should find that you can now read and write files to the shared drive. If you SSH into the server and check the permissions on the files you’ll find that they are owned by the user that logged into the share.
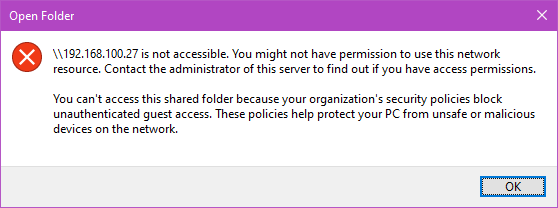
Guest Shares on SMB / CIFS with Windows 10
Upon trying to access the shares you’ve just created, you see the message shown below stating “You can’t access this shared folder because your organisation’s security polices block unauthenticated guest access”. Starting in 2021 Windows 10 (and presumably also Windows 11) blocked SMB2 and SMB3 access to guest shares. All access to SMB shares should now be authenticated. It is possible, for now at least, to allow guest access but who knows how long that will last. I think the best course of action is to just not create any shares with guess access.