In this article I’ll be installing an configuring a personal music server based on Navidrome. The first part of the install will be specific to my home network setup which is covered in numerous other posts.
Music Share Setup
The step assumes that you have a file server configured as per the Building a NAS Using Proxmox guide. At a command prompt on the Proxmox host create a new ZFS dataset called /tank/music and map it to the file server container:
mp2: /tank/music,mp=/mnt/music
Restart the file server and log in though the Cockpit frontend. Check that the mapping has worked through Navigator and, assuming it has, create a new share under File Sharing. Check that the music share is visible and can be written to, a Windows client is useful for this. Copy music into the share.
Mounting the Music Share
Now working on the media server which is a virtual machine running the latest version of Debian and Docker. I also assume you have created a personal account (in my case doozer) with the ID specified as per the building a NAS guide. Create the lxc-users group and assign your user to it. The creation of this user and group is necessary as the Samba server is offering shares that are only writeable to particular users. I also create the /data/mnt directory for everything to do with Docker such as mounts and settings. This just keeps things neat and tidy I find and give’s me a single point to backup.
There are full instructions on mounting a share here but to test the mount you can use the command below.
sudo mount -t cifs -o rw,vers=3.0,credentials=/root/.fileserver_smbcredentials,dir_mode=0775,file_mode=0775,uid=1000,gid=9999 //fileserver.example.co.uk/music /data/mnt/music
Note that I needed to use the fully qualified name of the file server as I’ve not set the search domain yet. I’ve also created a credentials file but see the previously mentioned guide for that. If the test works unmount with sudo umount /data/mnt/music. And mount permanetly in /etc/fstab with something like this:
//fileserver.example.co.uk/music /data/mnt/music cifs rw,vers=3.0,credentials=/root/.fileserver_smbcredentials,dir_mode=0775,file_mode=0775,uid=1000,gid=9999
Install the Navidrome Container
The suggested yaml configuration for Navidrome can be found here or on Docker Hub.
Most Docker containers that I install require at least a couple of volumes to be mounted. One is usually the configuration files and the other is the media they are serving, Navidrome follows this pattern exactly. When I first started setting up Docker containers I kept all the settings in a single config directory with subdirectories for each container. I’ve since realized the error of my ways and prefer to create a directory for the container with volumes within that. For Navidrome then I’ll be creating /data/navidrome/data for the settings. I keep the /data directory locked down and own the subdirectories as required.
doozer@media:/data$ sudo mkdir /data/navidrome
doozer@media:/data$ sudo chown doozer:doozer /data/navidrome/
doozer@media:/data$ cd /data/navidrome/
doozer@media:/data/navidrome$ mkdir data
doozer@media:/data/navidrome$ ls -la
total 12
drwxr-xr-x 3 doozer doozer 4096 Jul 15 15:15 .
drwxr-xr-x 4 root   root   4096 Jul 15 15:13 ..
drwxr-xr-x 2 doozer doozer 4096 Jul 15 15:15 data
With Portainer you’ve got two ways you can deploy a container, either as a stack or by filling in the container configuration forms. The stack route is far simpler and less error prone. I didn’t know this at the time so both routes are shown below. The yaml configuration that I’m using is shown below. Note that I’ve used the UID and GID of my account that matches what we mounted the share with.
version: "3"
services:
  navidrome:
    container_name: navidrome
    image: deluan/navidrome:latest
    user: 1000:1000
    ports:
      - "4533:4533"
    environment:
      ND_SCANSCHEDULE: 1h
      ND_LOGLEVEL: info
      ND_SESSIONTIMEOUT: 24h
    volumes:
      - "/data/navidrome/data:/data"
      - "/data/mnt/music:/music:ro"
The same configuration as above but though the interface. Log into Portainer and select the Docker instance you want to use. Click Containers and then Add Container in the top right. Set the name to Navidrome and the image to deluan/navidrome:latest. Add a port mapping from host 4533 to container 4533. This should cover the basic settings.
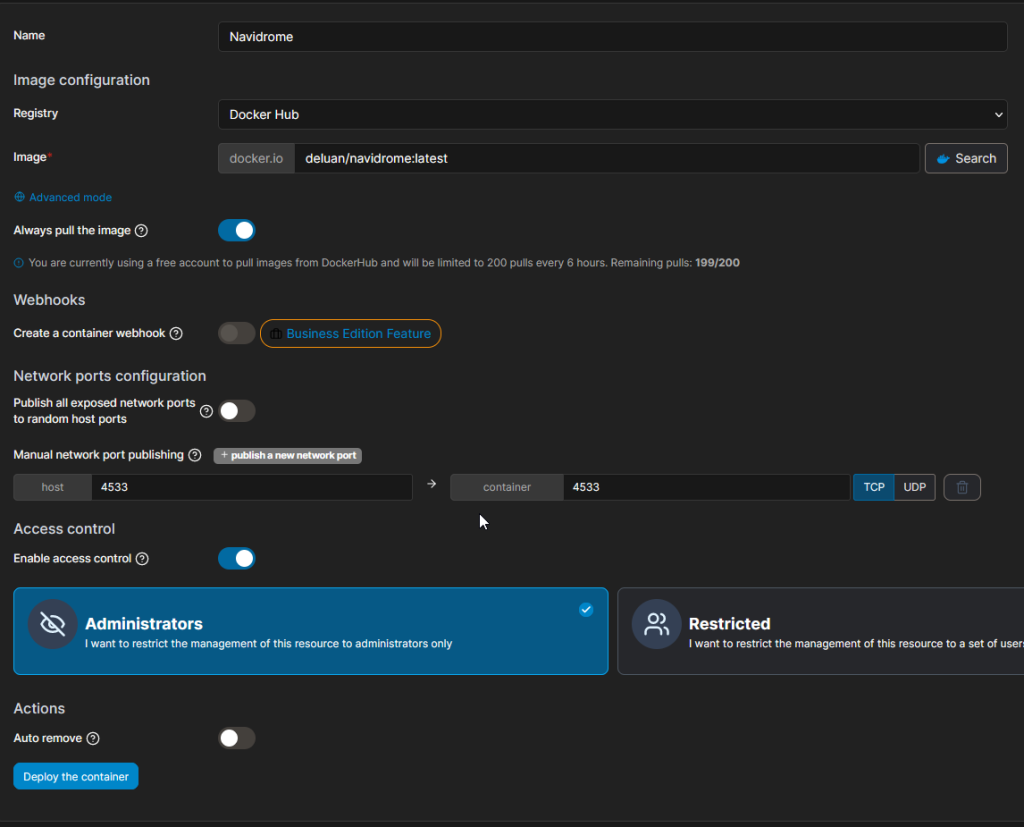
Under advanced settings you have a few changes to make.
IMPORTANT: I missed this when I first set the service up. Under the command and logging section you need to set a user of 1000:1000 or the container will run as root. If you forget and later change this you’ll find that the database (under /data/navidrome/data) is owned by root and the process can’t write to it. Simply owning as UID 1000 and a restart will fix this – better to just get it right from the start though. Same with the cache directory, you can either delete this or recursively own it as you.
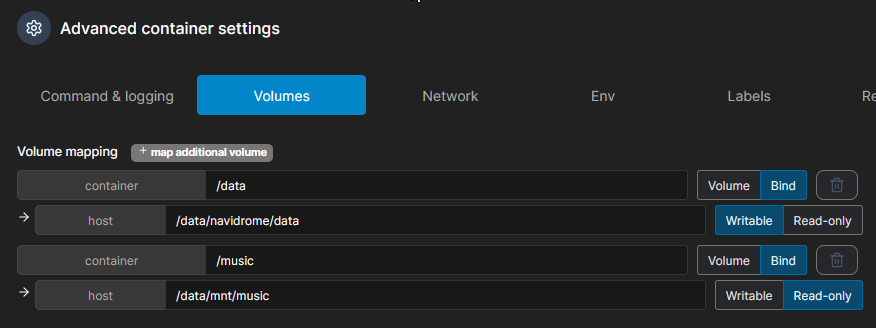
Under Volumes you need to create two new bind mounts, one for the Navidrome settings and the other for the data.
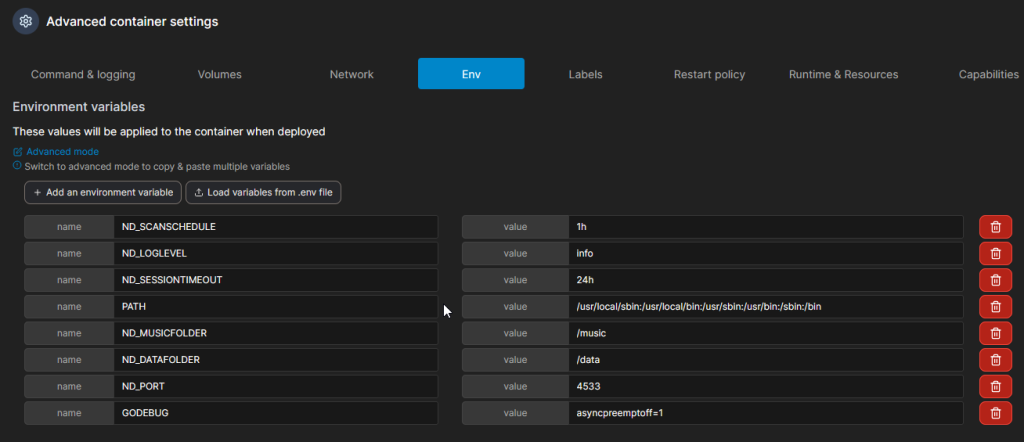
Under Env you need to specify the environment variables shown above in the Docker compose script. Leave the ND_BASEURL out as it seems it’s only job in life is to cause the container to fail to start. If it’s set incorrectly you’ll get an error message like the one shown below. This is mentioned here, I think the correct value would be something like /navidrome.
panic: chi: routing pattern must begin with '/' in '""/auth'
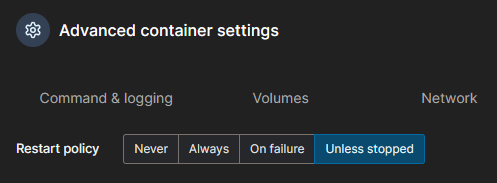
Under Restart Policy you want to select Unless Stopped as you want this container running all the time.
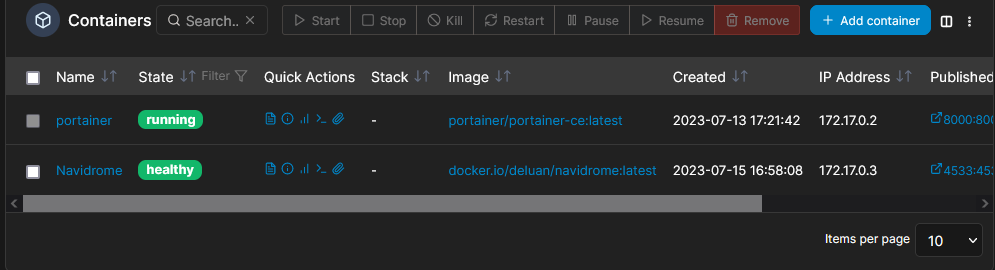
The other settings can be left at their default values. When you’re ready click Deploy the container and you should see the container enter the start state and then a few moments later the healthy state.
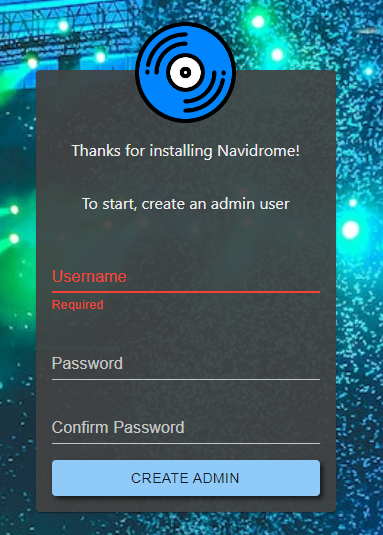
If you now visit your media server on the Navidrome port (e.g http://media.example.co.uk:4533/) you should see the login screen. The first person to log in is automatically made into a Navidrome admin.
Music Tagging
If you need to tidy up the ID3 tags on your music there are two good options as far as I can see: MusicBrains Picard and Mp3Tag. MusicBrainz Picard is very comprehensive and backed but a great online library of tags but it has a frighteningly steep learning curve. Mp3Tag is still complex but it’s learning curve is much smoother. It’s auto-tagging ability isn’t quite as good as Picard but it’s easily good enough. Most importantly, when using Mp3Tag I don’t feel like I’m about to inadvertently delete all my music.
Conclusion
Overall this is a fairly easy process but I have to admit I got stuck on setting up the volumes. Somehow I missed the button that lets you set up bind mounts into the containers and I spent ages trying to figure out how to make volumes work – doh! I’m going to listen to some music now, I deserve a break.